Self Hosted Installation
Installation of the self-hosted Logfire requires that you have a few prerequisites before installing.
Gathering Prerequisites
Helm CLI
This guide assumes that you will be using the Helm CLI to run commands. If you are running a CI/CD tool such as Argo etc. then please adapt instructions for that platform.
Kubernetes Admin
When running the helm chart, you will be required to create resources within a Kubernetes cluster, including secrets, pods, deployments, configurations, etc.
Image Pull Secrets
You will require image pull secrets to pull down the docker images from our private repository. Get in contact with us to get a copy of them.
Postgres Database
The Helm chart does not include a production-ready Postgres Database (only a development instance). You will be required to connect to, and create databases on a Postgres instance.
You will need to create 3 databases, that are used for different things.
While we are currently working on running Logfire on one database, for now they must be separated.
The 3 database in question are:
- Standard Postgres Database, i.e,
crud - Object Storage/File Metadata, i.e,
ff - Dex i.e,
dex
While they can be named anything, we will refer to them with these identifiers in this guide.
Identity Provider
An Identity Provider should ideally be set up to be used. I.e, via Github or Google.
You can view the full list of supported providers within the Dex connectors docs
Note that, when looking at connectors, the yaml config examples within the helm values.yaml file under the logfire-dex:config map.
I.e, if the connector config looks like this in Dex docs:
connectors:
- type: github
  id: github
  name: GitHub
  config:
    ...
Then within the helm values.yaml this will look like:
logfire-dex:
  config:
    connectors:
      - type: "github"
        id: "github"
        name: "GitHub"
        config:
          ...
Object Storage
Logfire requires Object Storage to store data. There are a number of different integrations that can be used:
- Amazon S3
- Google Cloud Storage
- Azure Storage
Each has their own set of environment variables that can be used to configure them. However if your kubernetes service account has the appropriate credentials, that can be used by setting serviceAccountName.
Ingress/HTTP Gateway
Depending on how you want to access Logfire, you can use a Kubernetes Ingress, or connect directly to the Logfire Service (logfire-service).
Initial values.yaml
Before doing any scaling/replication adjustments, we'll write out an initial helm chart values.yaml.
You can see all the configuration options in the default:
https://github.com/pydantic/logfire-helm-chart/blob/main/charts/logfire/values.yaml
Here's a checklist you can use to ensure you have all your prerequisites:
- Helm CLI Installed
- Image Pull Secrets
- Access to a Kubernetes cluster
- The 3 PostgreSQL database set up
- Identity Provider Configuration
- Object Storage Configuration
- HTTP Ingress information (i.e, hostname etc.)
Here's an example values.yaml to get you started:
adminEmail: admin-email@my-company.dev

# Configure the Image Pull Secrets

imagePullSecrets:
  - logfire-image-key

# Configure Postgres Databases

postgresDsn: postgres://postgres:postgres@postgres.example.com:5432/crud
postgresFFDsn: postgres://postgres:postgres@postgres.example.com:5432/ff

# Configure Dex Postgres & Identity Provider

logfire-dex:
  config:
    storage:
      type: postgres
      config:
        host: postgres.example.com
        port: 5432
        user: postgres
        database: dex
        password: postgres
        ssl:
          mode: disable
    connectors:
      - type: "github"
        id: "github"
        name: "GitHub"
        config:
          clientID: client_id
          clientSecret: client_secret
          getUserInfo: true

# Configure Object Storage

objectStore:
  uri: s3://logfire-example-bucket
  env:
    AWS_ACCESS_KEY_ID: logfire-example
    AWS_SECRET_ACCESS_KEY: logfire-example

# Configure Ingress

ingress:
  enabled: true
  tls: true
  hostname: logfire.example.com
  ingressClassName: nginx
This uses Amazon S3 as an Object Store, and Github as an Identity Provider, but you can change to your own environment. Read the sections below to see how you make changes.
Image Pull Secrets
You will require image pull secrets to pull down the docker images from our private repository. Get in contact with us to get a copy of them.
When you have the key.json file you can load it in as a secret like so:
kubectl create secret docker-registry logfire-image-key \
  --docker-server=us-docker.pkg.dev \
  --docker-username=_json_key \
  --docker-password="$(cat key.json)" \
  --docker-email=YOUR-EMAIL@example.com
Then you can either configure your service account to use them or specify this in values.yaml under imagePullSecrets:
imagePullSecrets:
  - logfire-image-key
Postgres Databases
With the 4 databases configured, you will need to configure Logfire & Dex within values.yaml.
The 2 databases for logfire (crud and ff) can be configured either via the DSNs in values.yaml or as a secret.
I.e,
postgresDsn: postgres://postgres:postgres@postgres.example.com:5432/crud
postgresFFDsn: postgres://postgres:postgres@postgres.example.com:5432/ff
Or if you have a secret containing postgresDsn and postgresFFDsn keys:
postgresSecret:
  enabled: true
  name: "my-postgres-secret"
For Dex (dex), this is configured via a config map, rather than a DSN:
logfire-dex:
  config:
    storage:
      type: postgres
      config:
        host: postgres.example.com
        port: 5432
        user: postgres
        database: dex
        password: postgres
        ssl:
          mode: disable
If you want to use a secret for the password you can substitute with $ENV_NAME syntax:
logfire-dex:
  env:
    - name: DEX_POSTGRES_PASSWORD
      valueFrom:
        secretKeyRef:
          name: my-postgres-secret
          key: dex-password
  config:
    storage:
      type: postgres
      config:
        host: postgres.example.com
        port: 5432
        user: postgres
        database: dex
        password: $DEX_POSTGRES_PASSWORD
        ssl:
          mode: disable
Identity Provider
Depending on what connector you want to use, you can configure dex connectors accordingly.
Here's an example using github as a connector:
logfire-dex:
...
config:
connectors:
- type: "github"
id: "github"
name: "GitHub"
config:
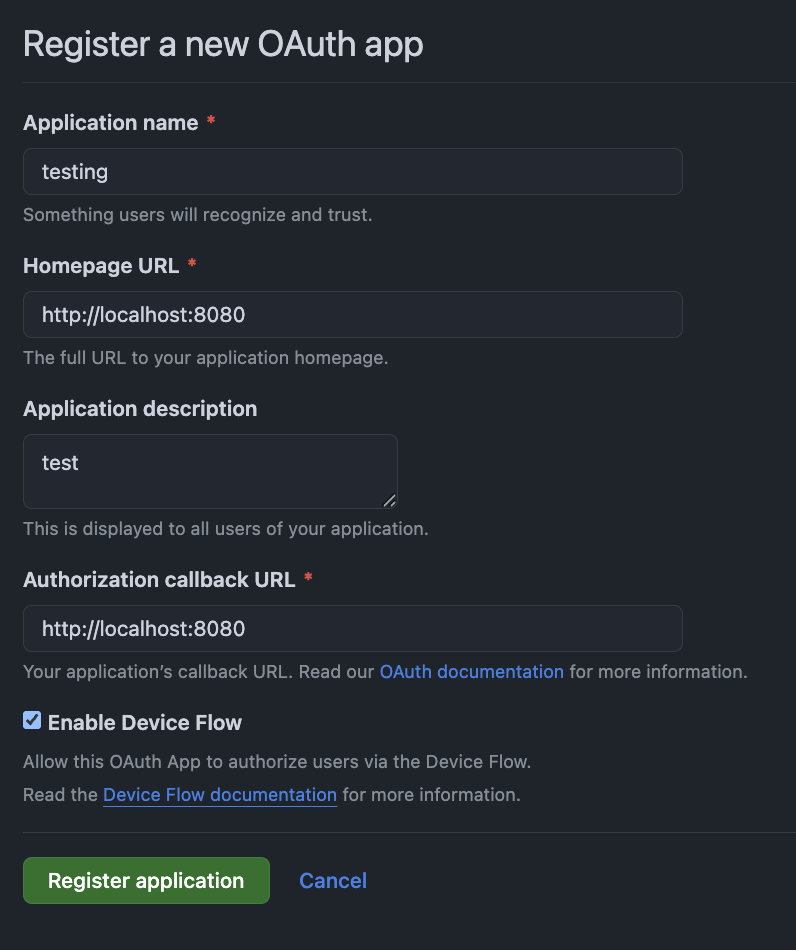
# You get clientID and clientSecret by creating a GitHub OAuth App
# See https://docs.github.com/en/apps/oauth-apps/building-oauth-apps/creating-an-oauth-app
clientID: client_id
clientSecret: client_secret
getUserInfo: true
To use GitHub as an example, you can find general instructions for creating an OAuth app in the GitHub docs. It should look something like this:
Dex allows configuration parameters to reference environment variables.
This can be done by using the $ symbol. For example, the clientID and clientSecret can be set as environment variables:
logfire-dex:
  env:
    - name: GITHUB_CLIENT_ID
      valueFrom:
        secretKeyRef:
          name: my-github-secret
          key: client-id
    - name: GITHUB_CLIENT_SECRET
      valueFrom:
        secretKeyRef:
          name: my-github-secret
          key: client-secret
  config:
    connectors:
      - type: "github"
        id: "github"
        name: "GitHub"
        config:
          clientID: $GITHUB_CLIENT_ID
          clientSecret: $GITHUB_CLIENT_SECRET
          getUserInfo: true
You would have to manually (or via IaC, etc.) create my-github-secret.
This allows you to avoid putting any secrets into a values.yaml file.
Object Storage
There are a number of different integrations that can be used:
- Amazon S3
- Google Cloud Storage
- Azure Storage
Each has their own set of environment variables that can be used to configure them. However if your kubernetes service account has the appropriate credentials, that be used by setting serviceAccountName.
Amazon S3
Variables extracted from environment:
AWS_ACCESS_KEY_ID-> access_key_idAWS_SECRET_ACCESS_KEY-> secret_access_keyAWS_DEFAULT_REGION-> regionAWS_ENDPOINT-> endpointAWS_SESSION_TOKEN-> tokenAWS_CONTAINER_CREDENTIALS_RELATIVE_URI-> https://docs.aws.amazon.com/AmazonECS/latest/developerguide/task-iam-roles.htmlAWS_ALLOW_HTTP-> set to "true" to permit HTTP connections without TLS
Example:
objectStore:
  uri: s3://<bucket_name>
  # Note: not needed if the service account specified by `serviceAccountName` itself has credentials
  env:
    AWS_DEFAULT_REGION: <region>
    AWS_SECRET_ACCESS_KEY:
      valueFrom:
        secretKeyRef:
          name: my-aws-secret
          key: secret-key
    AWS_ACCESS_KEY_ID: <access_key>
Google Cloud Storage
Variables extracted from environment:
GOOGLE_SERVICE_ACCOUNT: location of service account fileGOOGLE_SERVICE_ACCOUNT_PATH: (alias) location of service account fileSERVICE_ACCOUNT: (alias) location of service account fileGOOGLE_SERVICE_ACCOUNT_KEY: JSON serialized service account keyGOOGLE_BUCKET: bucket nameGOOGLE_BUCKET_NAME: (alias) bucket name
Example:
objectStore:
  uri: gs://<bucket>
  # Note: not needed if the service account specified by `serviceAccountName` itself has credentials
  env:
    GOOGLE_SERVICE_ACCOUNT_PATH: /path/to/service/account
Azure Storage
Variables extracted from environment:
AZURE_STORAGE_ACCOUNT_NAME: storage account nameAZURE_STORAGE_ACCOUNT_KEY: storage account master keyAZURE_STORAGE_ACCESS_KEY: alias for AZURE_STORAGE_ACCOUNT_KEYAZURE_STORAGE_CLIENT_ID: client id for service principal authorizationAZURE_STORAGE_CLIENT_SECRET: client secret for service principal authorizationAZURE_STORAGE_TENANT_ID: tenant id used in oauth flows
Example:
objectStore:
  uri: az://<container_name>
  env:
    AZURE_STORAGE_ACCOUNT_NAME: <storage_account_name>
    AZURE_STORAGE_ACCOUNT_KEY:
      valueFrom:
        secretKeyRef:
          name: my-azure-secret
          key: account-key
Configure HTTP Ingress
There is a hostname that is required to be set: I.e, logfire.example.com. Set via the ingress.hostname value.
Here's an example of using nginx as an ingress controller, and providing a cert manager annotation to manage the SSL certificate:
ingress:
  enabled: true
  tls: true
  hostname: logfire.example.com
  ingressClassName: nginx
  annotations:
    cert-manager.io/cluster-issuer: "letsencrypt"
Using logfire-service directly
We expose a service called logfire-service which will route traffic appropriately.
If you don't want to use the ingress controller, you will still need to define hostnames and whether you are externally using TLS:
I.e, this config will turn off the ingress resource, but still set appropriate cors headers for the logfire-service:
ingress:
  # this turns off the ingress resource
  enabled: false
  # used to ensure appropriate CORS headers are set.  If your browser is accessing it on https, then needs to be enabled here
  tls: true
  # used to ensure appropriate CORS headers are set.
  hostname: logfire.example.com
If you are not using kubernetes ingress, you must still set the hostnames under the ingress configuration.
Deploying the Helm Chart
Once you have created the helm chart values.yaml as above, then the next step is to pull down the helm chart and deploy it.
- If you haven't already, grab the latest helm chart for Logfire:
helm repo add pydantic https://charts.pydantic.dev/ - Create a namespace to store all of your resources:
kubectl create namespace logfire - Add in the image pull secret to your namespace (& any other secrets):
kubectl -n logfire create secret docker-registry logfire-image-key \ --docker-server=us-docker.pkg.dev \ --docker-username=_json_key \ --docker-password="$(cat key.json)" \ --docker-email=YOUR-EMAIL@example.com - Then, using your
values.yaml, you can deploy it like so:helm --namespace=logfire upgrade --install logfire pydantic/logfire -f values.yaml --wait
If everything is configured correctly, you will see a list of pods deployed and ready:
NAME                                             READY   STATUS    RESTARTS   AGE
logfire-backend-6956589db6-rvt4s                 1/1     Running   0          2m9s
logfire-dex-74f8b9d5f8-rqg9k                     1/1     Running   0          2m9s
logfire-ff-cache-64b97f99b4-twj8v                1/1     Running   0          2m9s
logfire-ff-conhash-cache-79bd9cf69-w7ktb         1/1     Running   0          2m9s
logfire-ff-ingest-api-688cf4f944-274b7           1/1     Running   0          2m9s
logfire-ff-ingest-worker-68c45668fd-mmmt9        1/1     Running   0          2m9s
logfire-ff-maintenance-worker-6bc45f65f5-l5lv9   1/1     Running   0          2m9s
logfire-ff-query-api-77d8798dc6-f4m67            1/1     Running   0          2m8s
logfire-otel-collector-7bdcf78dd9-b9d7q          1/1     Running   0          2m8s
logfire-redis-65fb774fc-s8xgk                    1/1     Running   0          2m9s
logfire-scheduler-745657cc5f-954jv               1/1     Running   0          2m8s
logfire-service-7688f7c56-q7lmk                  1/1     Running   0          2m8s
logfire-worker-85bd6f5c47-mx8pz                  1/1     Running   0          2m8s
Once completed, have a read through scaling to start adding replicas.
Common Errors
There are a couple of common errors that can happen when deploying the helm chart for the first time
Bad Image Secret
When the helm chart runs, it's required to pull the images down from the private registry. You must ensure you have the image pull secrets configured in values.yaml correctly.
The helm chart, if it has the --wait argument will exit after some time with the following errors:
Error: UPGRADE FAILED: pre-upgrade hooks failed: 1 error occurred:
    * timed out waiting for the condition
Viewing the list of pods you will see the following status:
NAME                                             READY   STATUS         RESTARTS   AGE
logfire-backend-migrations-plmh6                 0/1     ErrImagePull   0          70s
To fix: ensure that you have configured the image pull secret within your values.yaml file.
Postgres Passwords
When the helm chart runs, there are two migration processes that run to create the database schema needed. These migrations are required to run before bringing up a lot of the pods. If the postgres password is incorrect or the instance is inaccessible, the helm installation will not finish.
The helm chart, if it has the --wait argument, will exit after some time with the following error:
Error: UPGRADE FAILED: pre-upgrade hooks failed: 1 error occurred:
    * job logfire-ff-migrations failed: BackoffLimitExceeded
While the helm chart is running, you will see the following pod crashing:
NAME                                             READY   STATUS             RESTARTS      AGE
logfire-ff-migrations-48jqb                      0/1     CrashLoopBackOff   3 (43s ago)   86s
You can see the error in the pod's console:
2025-06-24T06:56:46.469773Z  INFO fusionfire::config::entrypoints running fusionfire command command=migrate
2025-06-24T06:56:46.469840Z  INFO fusionfire::config::entrypoints running migrations
error running fusionfire: error returned from database: password authentication failed for user "postgres"

Caused by:
    password authentication failed for user "postgres"
To fix: ensure that your postgres passwords are correct, and that you can connect to Postgres from the Kubernetes cluster.